Last Updated on October 11, 2026 by recipeinspire
Making seasonal decor is a rewarding way to enjoy autumn. If you like yarn, this crochet Halloween Pumpkin project builds your skills and creates a charming centerpiece.
This guide offers a clear, step-by-step approach for making a soft, stuffed figure. You will use basic stitches to shape the pumpkin, add texture, and finish the assembly neatly.
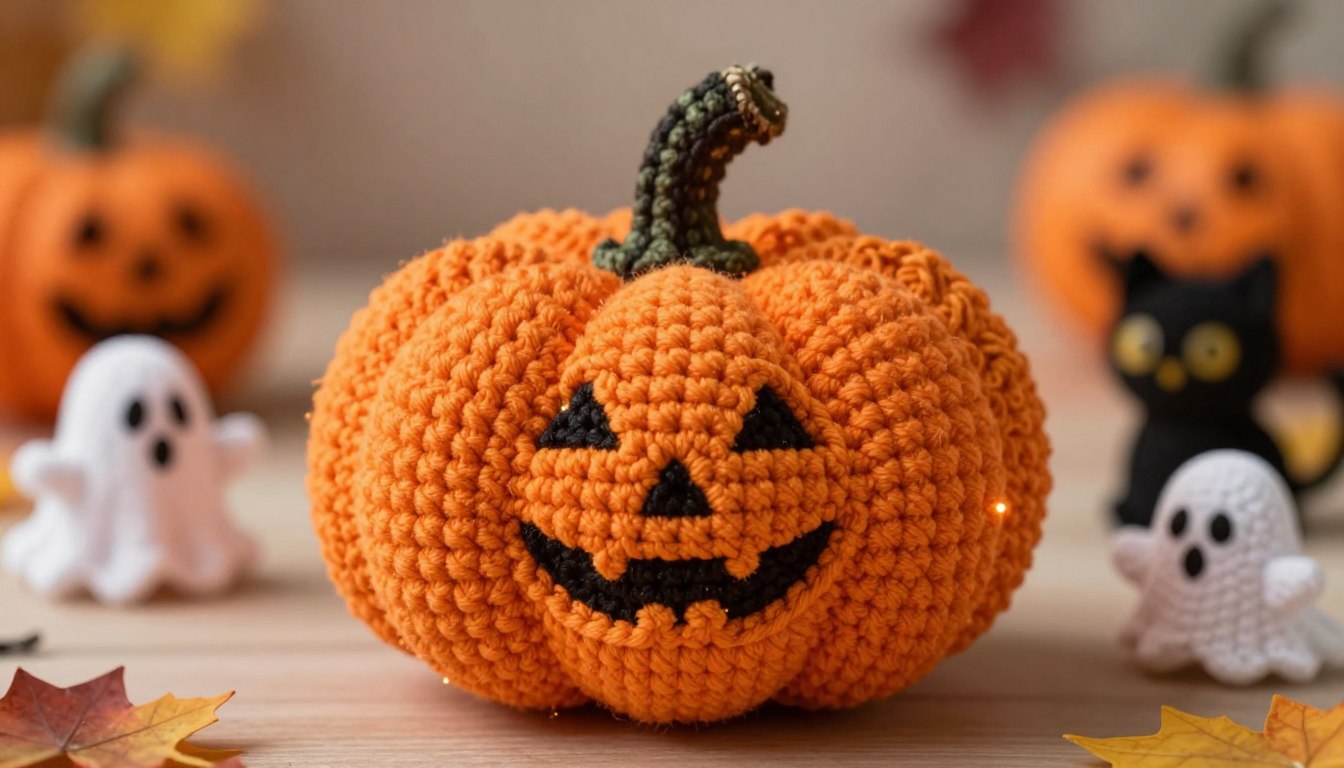
Beginners and experienced crafters can follow this tutorial in manageable steps. We cover materials, shaping, stuffing, and finishing touches for your crochet Halloween Pumpkin. Add a cozy, handmade touch to your space this season.
Key Takeaways
- Learn essential techniques for shaping soft yarn figures.
- Discover the best materials for a durable and festive result.
- Follow a simple, logical workflow suitable for all skill levels.
- Master the art of stuffing and finishing for a polished appearance.
- Gain confidence in creating custom seasonal home decorations.
Gather Materials and Choose the Pumpkin Design
Creating a beautiful crochet halloween pumpkin begins with quality materials that match your plan. The right tools make this project smooth and enjoyable.
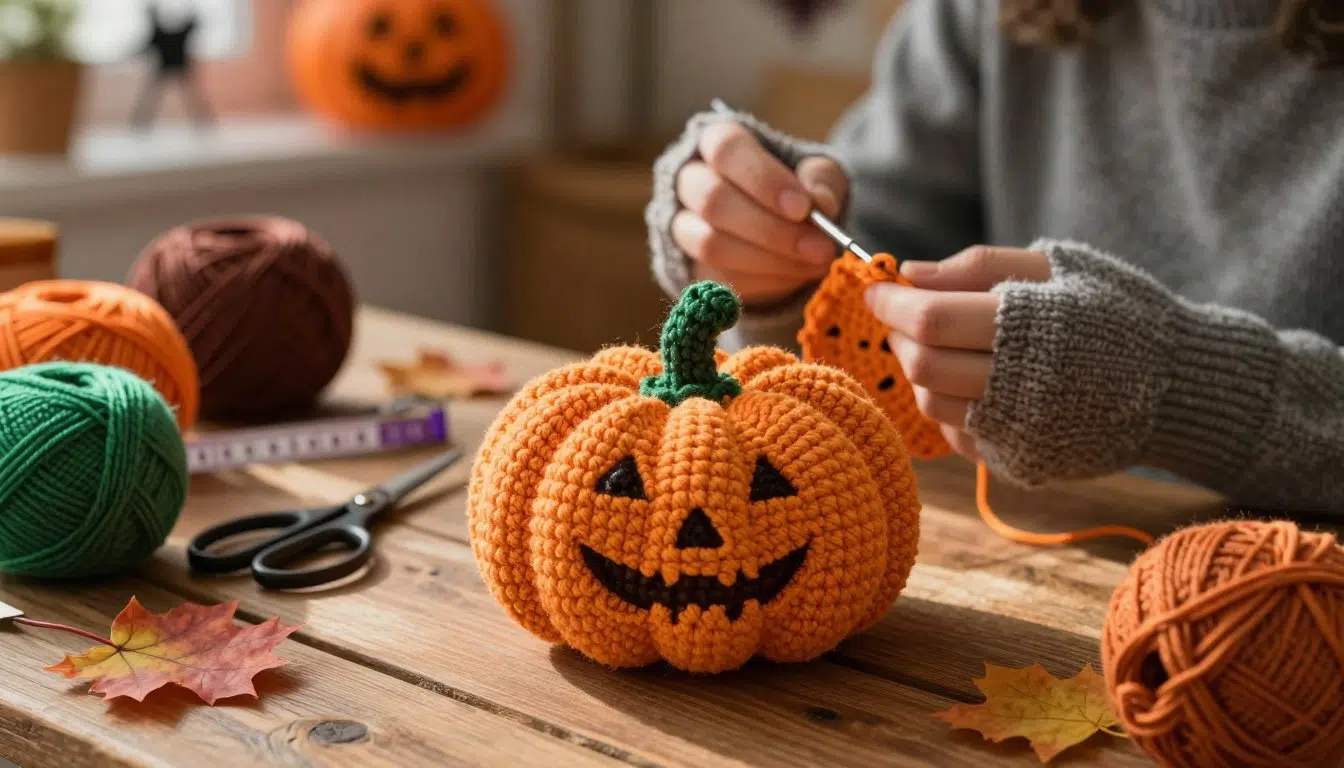
Select Yarn, Crochet Hook, and Fiberfill
Choose the right yarn weight for your project. Medium-weight (worsted) acrylic or cotton yarn suits most patterns. It gives the pumpkin enough structure to keep its shape.
Pair the yarn with a hook slightly smaller than the size listed on its label. This makes a tight fabric that keeps stuffing from showing.
“The secret to a professional-looking plush item is using a hook size that creates a dense, uniform stitch pattern.”
Use high-quality polyester fiberfill for stuffing. It is lightweight, washable, and gives your finished piece the right amount of squish.
Choose Pumpkin Colors and Optional Halloween Accents
Traditional orange is classic, but other colors can match your home decor. Consider these popular options for your crochet halloween pumpkin:
- Classic Harvest: Deep oranges, burnt reds, and rustic browns.
- Modern Chic: Cream, sage green, or muted mustard yellow.
- Spooky Theme: Stark white, charcoal gray, or deep purple.
Gather optional accents, such as felt faces, buttons for eyes, and embroidery thread for fine details. These additions can turn a simple shape into a festive character.
Check Crochet Skill Level and Finished Size
Before starting, check that the pattern matches your skill level. Most pumpkin designs suit beginners and use basic stitches, such as single crochet and increases.
Decide the finished size of your crochet halloween pumpkin. Larger pumpkins need more yarn and fiberfill. Smaller ones make quick gifts or tiered tray displays.
| Pumpkin Size | Yarn Needed | Hook Size |
|---|---|---|
| Small | 50 yards | 3.5mm |
| Medium | 120 yards | 4.5mm |
| Large | 250 yards | 5.5mm |
Understand the Crochet Pumpkin Pattern Before Starting
Reviewing your guide first can save time and prevent frustration later. A well-written crochet pumpkin pattern serves as a roadmap for your creative work. Checking each step early helps every stitch support a polished result.
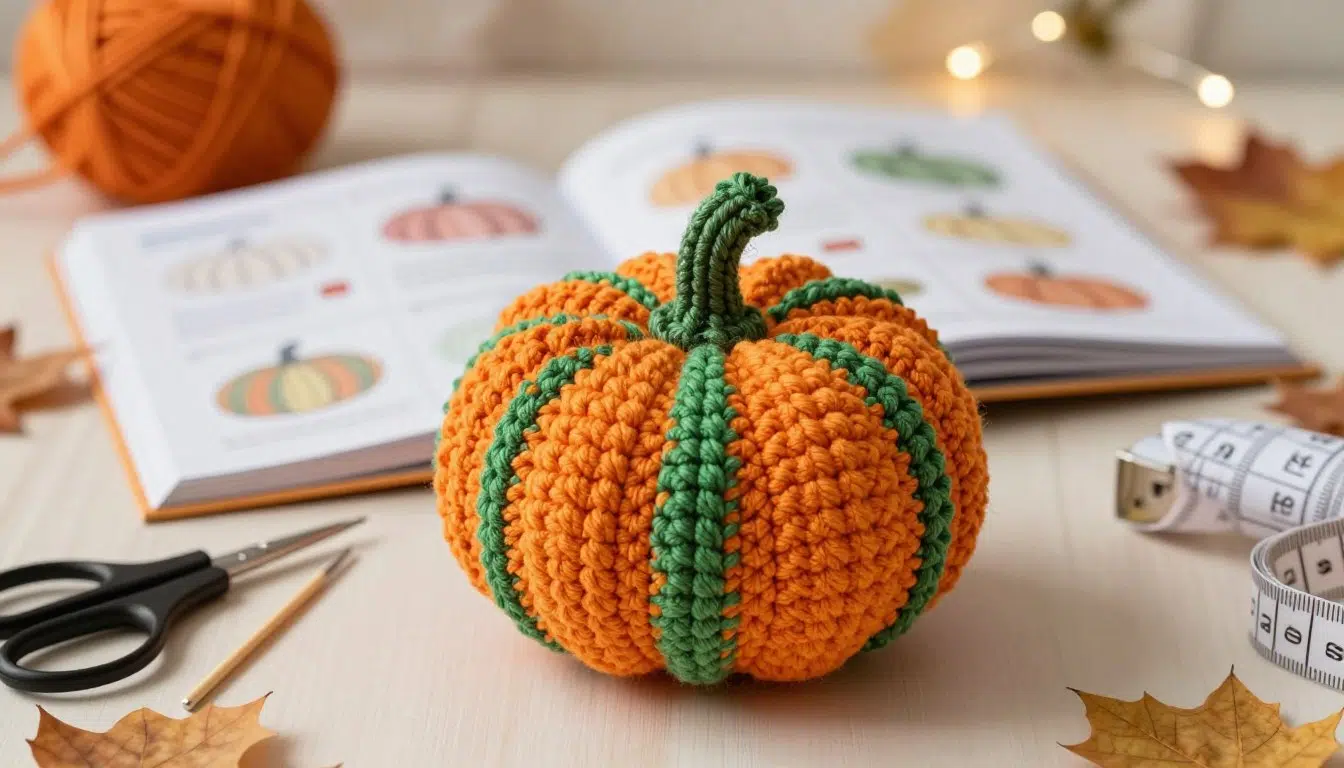
Review Abbreviations and Basic Crochet Stitches
Most patterns use standard abbreviations to keep instructions brief. You may see terms like sc for single crochet, inc for increase, and dec for decrease. Learning these codes prevents confusion during assembly.
If you are unsure about a stitch, practice it first with scrap yarn. This confidence-building step keeps your tension steady throughout the project. Check the pattern notes for special stitches unique to that design.
Understand Working in Continuous Rounds
Many pumpkin designs use continuous rounds instead of joined rows. You do not slip stitch at the end of each round. Instead, move to the next stitch in a spiral fashion.
A stitch marker is essential for this method. It shows where each round begins and ends. Without one, you can lose your place in the crochet pumpkin pattern, causing an uneven shape.
Plan the Pumpkin Shape, Ridges, and Opening
The project’s shape depends on careful increases and decreases. Increases widen the fabric for the pumpkin’s round belly, while decreases pull the top and bottom inward. Understanding this flow helps you picture flat fabric becoming a three-dimensional object.
Consider how you will form the ridges. Some designs add them while stitching, while others need yarn afterward. Plan the opening so you can stuff the pumpkin comfortably before closing it securely.
Make the Main Body of the Crochet Halloween Pumpkin
Build the pumpkin’s round, plump shape with planned increases and decreases. These steps help your diy crochet pumpkin maintain a neat, balanced form. This stage creates the final shape of your seasonal decoration.
Step 1: Create the Magic Ring
Start by making a magic ring, also called an adjustable loop. You can pull its center tight, so the base has no unwanted gaps. Secure the ring with a chain stitch, then work the first round inside it.
Step 2: Increase Stitches to Form the Base
To widen the circle, make regular increases in every round. Work two stitches in one space to build the base of your diy crochet pumpkin. Continue until the base reaches your desired diameter.
Step 3: Crochet Even Rounds for the Pumpkin Width
When the base is complete, stop increasing and work even rounds. Place one stitch in each stitch from the previous row. These rounds add height and create the pumpkin’s characteristic width.
Step 4: Decrease Stitches to Shape the Top
When it reaches the needed height, begin decreasing to close the top. Combine two stitches into one to curve the fabric inward. This creates the rounded, tapered look of a realistic diy crochet pumpkin.
Count Stitches After Each Round
A balanced shape depends on consistency. Count your stitches after every round to avoid adding or skipping any. An accurate count helps prevent a lopsided result.
Correct Common Tension and Shaping Problems
If your pumpkin looks uneven, check your tension right away. Consistent yarn tension is the secret to a smooth, professional finish. If you see gaps, use a smaller hook size to make the fabric denser.
“The secret to a perfect handmade pumpkin lies in the rhythm of your stitches; keep your tension steady to ensure the stuffing stays hidden inside.”
| Construction Phase | Stitch Technique | Goal |
|---|---|---|
| Base | Increases | Establish width |
| Body | Even Rounds | Build height |
| Top | Decreases | Create curvature |
Stuff and Close the Pumpkin Shape
Turn your flat crochet piece into a plump, festive pumpkin with careful stuffing and finishing. Following this pumpkin crochet tutorial helps your project look sturdy and professionally made. Proper closure completes a high-quality handmade decoration.
Step 5: Add Fiberfill Without Overstretching the Fabric
Insert small handfuls of polyester fiberfill gently through the pumpkin opening. Avoid overstuffing, or stretched stitches may reveal the filling. Take your time to spread the stuffing evenly across the base and sides.
Step 6: Finish the Final Decreases
Fill the pumpkin to your desired firmness, then continue the final decrease rounds. These stitches pull the fabric inward, forming a smooth, rounded top. Keep your tension steady during the last few rows for an even shape.
Step 7: Cinch the Opening and Secure the Yarn
After the final round, cut the yarn and leave a tail about 10 inches long. Use a tapestry needle to weave the tail through the remaining front loops. Pull the tail tightly to close the opening and form a clean, flat center.
Keep the Pumpkin Firm but Naturally Rounded
A well-made pumpkin should feel firm to the touch while keeping a soft, natural curve. If it feels too hard, remove some fiberfill so the fabric can settle. This balance gives your pumpkin crochet tutorial project a realistic look.
Hide Loose Ends Neatly
Push your needle through the pumpkin’s center and out the bottom. Pull the yarn slightly to make a small indentation, then secure it with a knot. Trim the excess yarn close to the fabric so it disappears inside the stuffing.
| Material Type | Firmness Level | Best Use Case |
|---|---|---|
| Polyester Fiberfill | High | Standard decorative pumpkins |
| Cotton Batting | Medium | Soft, squishy pumpkins |
| Wool Roving | Low | Eco-friendly, dense projects |
Add the Stem and Create Pumpkin Ridges
Turning a simple stuffed sphere into a realistic gourd takes just a few final steps. These touches create professional-looking crocheted pumpkin decorations for any seasonal display.
Step 8: Crochet or Prepare a Stem
You have two stem options. Crochet a small cylinder with contrasting yarn. For a rustic look, use driftwood or a felted wool branch.
If you crochet the stem, work in a tight spiral so it stays firm. Consistency in your stitch tension keeps stuffing from showing through the stem walls.
Attach the Stem to the Pumpkin Center
When the stem is ready, place it over the pumpkin’s top center and magic ring. Use a tapestry needle and long yarn tail to sew it securely.
Stitch through the stem and pumpkin top several times. This reinforces the connection and keeps the stem upright during handling.
Use Yarn or Embroidery Thread to Form Vertical Ridges
Create a realistic, segmented look by pulling yarn through the pumpkin’s center. Use a long piece matching the pumpkin color for a seamless finish.
Space the Ridges Evenly Around the Pumpkin
Insert your needle through the center bottom, then pull it through the center top. Wrap the yarn around the pumpkin and pull it through the center to form the first ridge.
Repeat this process around the entire circumference. Even spacing creates a balanced look, so measure the distance between each pull.
Adjust the Tension for Deeper or Softer Indentations
Ridge depth depends on how tightly you pull the yarn. For a dramatic, sculptural effect, pull firmly to create deep valleys in the fabric.
For a softer, subtler look, use light tension. These adjustments make your crocheted pumpkin decorations look unique and handmade.
Decorate the Pumpkin for Halloween
Unique details can turn a simple yarn sphere into charming halloween crochet decor that shows your personal style.
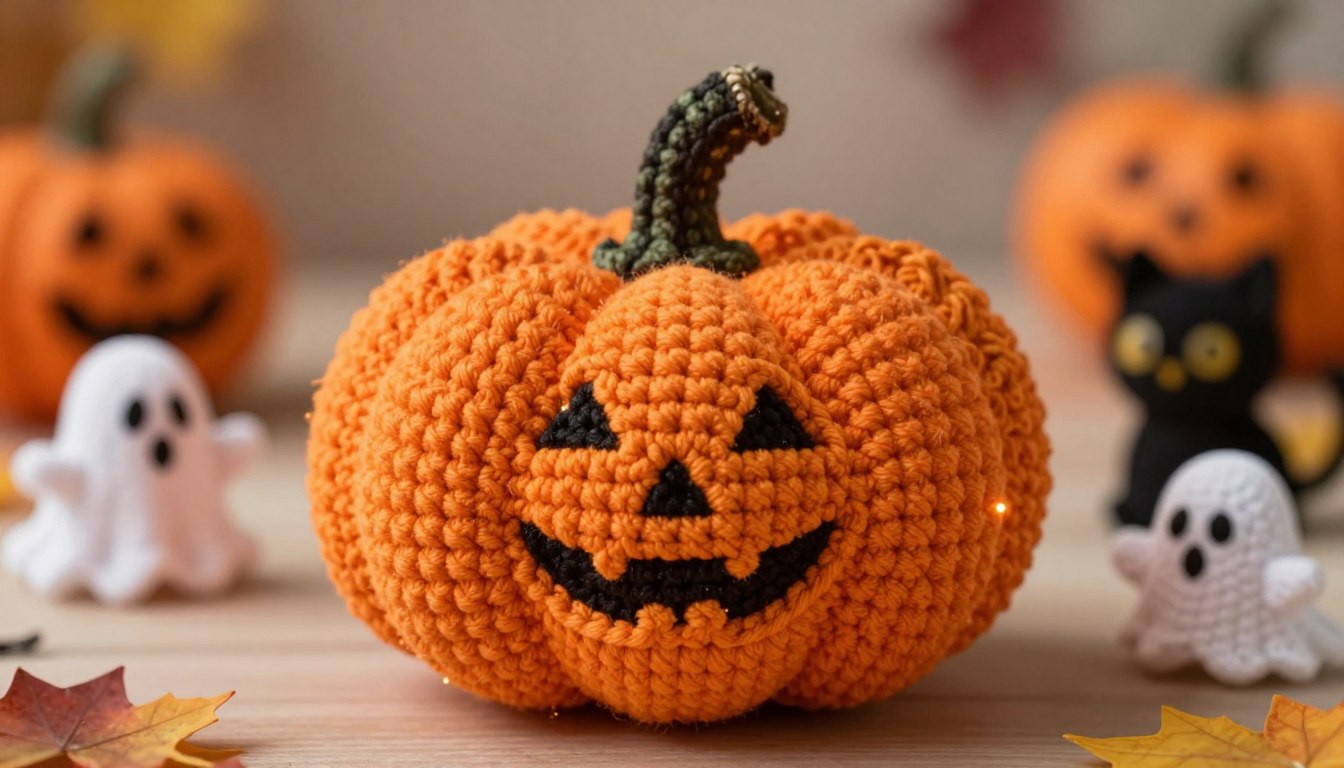
Make a Crochet Jack-o’-Lantern Face
Create a classic jack-o’-lantern face by crocheting small, flat shapes with black yarn. Work a few rows of single crochet stitches for the eyes and mouth.
Sew these pieces onto your pumpkin’s front with a tapestry needle. This method creates a soft, cohesive texture that matches your project.
Add Felt, Embroidery, Buttons, or Appliqué Details
Try other materials if you want a different look. Felt creates sharp, clean lines, while embroidery makes delicate facial features.
Buttons add whimsical, rustic charm, and fabric appliqués add color or pattern. Choose materials that complement your halloween crochet decor theme.
| Material | Texture | Difficulty | Best For |
|---|---|---|---|
| Felt | Smooth | Easy | Bold Shapes |
| Embroidery | Flat | Moderate | Fine Details |
| Buttons | Raised | Easy | Whimsical Style |
| Crochet | Soft | Moderate | Cohesive Look |
Create Coordinated Halloween Crochet Decor
Create pumpkins in different sizes and colors to make your home feel festive. Matching yarn colors or facial expressions can connect your halloween crochet decor.
Add small accessories, such as crocheted vines or leaves, around the stem. These touches create a polished display for any mantel or shelf.
Choose Secure Embellishments for Homes With Children or Pets
Safety matters when decorating homes with young children or curious pets. Sew buttons or small beads sewn on extremely tightly to prevent choking hazards.
For greater safety, use embroidered features or felt pieces glued or stitched flat. These durable options prevent small parts from detaching during play.
Finish, Display, and Care for the Handmade Pumpkin
Give your pumpkin final touches before displaying it in your home. These handmade halloween decorations create a strong focal point for your seasonal style. Refining your work helps each stitch look neat and polished.
Shape and Inspect the Completed Pumpkin
Gently massage the pumpkin to spread the fiberfill evenly. This creates a rounded shape that resembles a real gourd. Check that the stem sits securely and centered on top.
Inspect the vertical ridges and pull them tight enough to form clear indentations. Check the seams and face details for loose yarn ends. A balanced pumpkin should sit flat without tipping.
“The details are not the details. They make the design.”
— Charles Eames
Style Crocheted Pumpkin Decorations Around the Home
Display your pumpkin on a fireplace mantel, bookshelf, or dining table centerpiece. Mixing sizes and colors creates a visually dynamic autumn arrangement. Add dried leaves, pinecones, or small twigs for a natural touch.
Group multiple pumpkins in odd numbers for a more professional look. Add fairy lights or battery-operated candles for a warm, festive glow.
Clean, Store, and Preserve the Pumpkin Between Seasons
Proper care keeps your project fresh for years after the holiday season ends. Remove dust with a soft lint roller or gentle vacuum attachment. Do not submerge the pumpkin, because water can damage the fiberfill and change its shape.
Store your handmade halloween decorations in a breathable fabric bag or clean plastic bin. Keep them in a cool, dry place away from direct sunlight. This prevents fading and preserves your crochet work for yearly traditions.
Conclusion
Creating handmade pumpkins transforms your home into a festive retreat. You now have skills to select quality yarn, master continuous rounds, and shape unique silhouettes.
These projects offer excellent halloween craft ideas for makers at every skill level. Try different sizes and vibrant color palettes to match your personal style.
Adding unique faces or stems makes each piece a one-of-a-kind treasure. These items store easily, so you can enjoy your work for many seasons.
Return to these steps whenever you want to expand your collection. Exploring new halloween craft ideas keeps your creative energy strong throughout the autumn months.
Share finished pumpkins with friends or family to spread the joy of handmade decor. Your dedication creates a cozy and inviting atmosphere for every celebration.
FAQ
What is the best type of yarn to use for a diy crochet pumpkin?
For a classic, durable look, most crafters recommend medium-weight (Level 4) acrylic yarn. Red Heart Super Saver and Lion Brand Vanna’s Choice offer a wide variety of autumnal shades and maintain their structure well. Use a 4.0mm (G) hook, smaller than the label recommends, to keep fiberfill hidden in your crochet halloween pumpkin.
Is this pumpkin crochet tutorial suitable for beginner crafters?
Absolutely. This project suits beginners because it uses the magic ring, single crochet stitches, and basic increases and decreases. Following a crochet pumpkin pattern lets you practice continuous rounds, a core skill for handmade halloween decorations and amigurumi toys.
How do I create the realistic vertical ridges on crocheted pumpkin decorations?
After stuffing and closing the main body, use a long yarn strand and tapestry needle. Thread the yarn from the pumpkin’s bottom center to its top, wrap it outside, and pull tight, creating an indentation. Repeat this five or six times around the sphere to create the “ribbed” look for halloween crochet decor.
Can I customize these pumpkins into Jack-o’-lanterns for more halloween craft ideas?
Yes, personalizing your project is easy. You can cut black felt facial features and glue them with Aleene’s Tacky Glue. Or use black embroidery floss to stitch a spooky or silly expression onto the fabric. These details turn a standard autumn decoration into a festive crochet halloween pumpkin and centerpiece for October celebrations.
What is the best way to clean and store my handmade halloween decorations?
To preserve your work, spot-clean the yarn with a damp cloth and mild detergent, like Woolite. Avoid submerging the pumpkin because the fiberfill can become clumpy. At season’s end, store crocheted pumpkin decorations in a tight-lidded plastic bin, protecting them from dust and moisture for years.