Last Updated on August 6, 2025 by recipeinspire
Table of Contents
How to Make 7 Spooktacular Halloween Cakesicles at Home
Are you ready to bewitch your taste buds? Whip up your own Halloween Cakesicles with our easy-to-follow tips and treats. Perfect for spooky festivities! Discover the magic inside. Did you know that nearly 70% of households in the U.S. participate in Halloween festivities? With over 172 million potential cake lovers out there, it’s time to impress your friends and family with your own stylish Halloween cakesicles.
Ingredients List
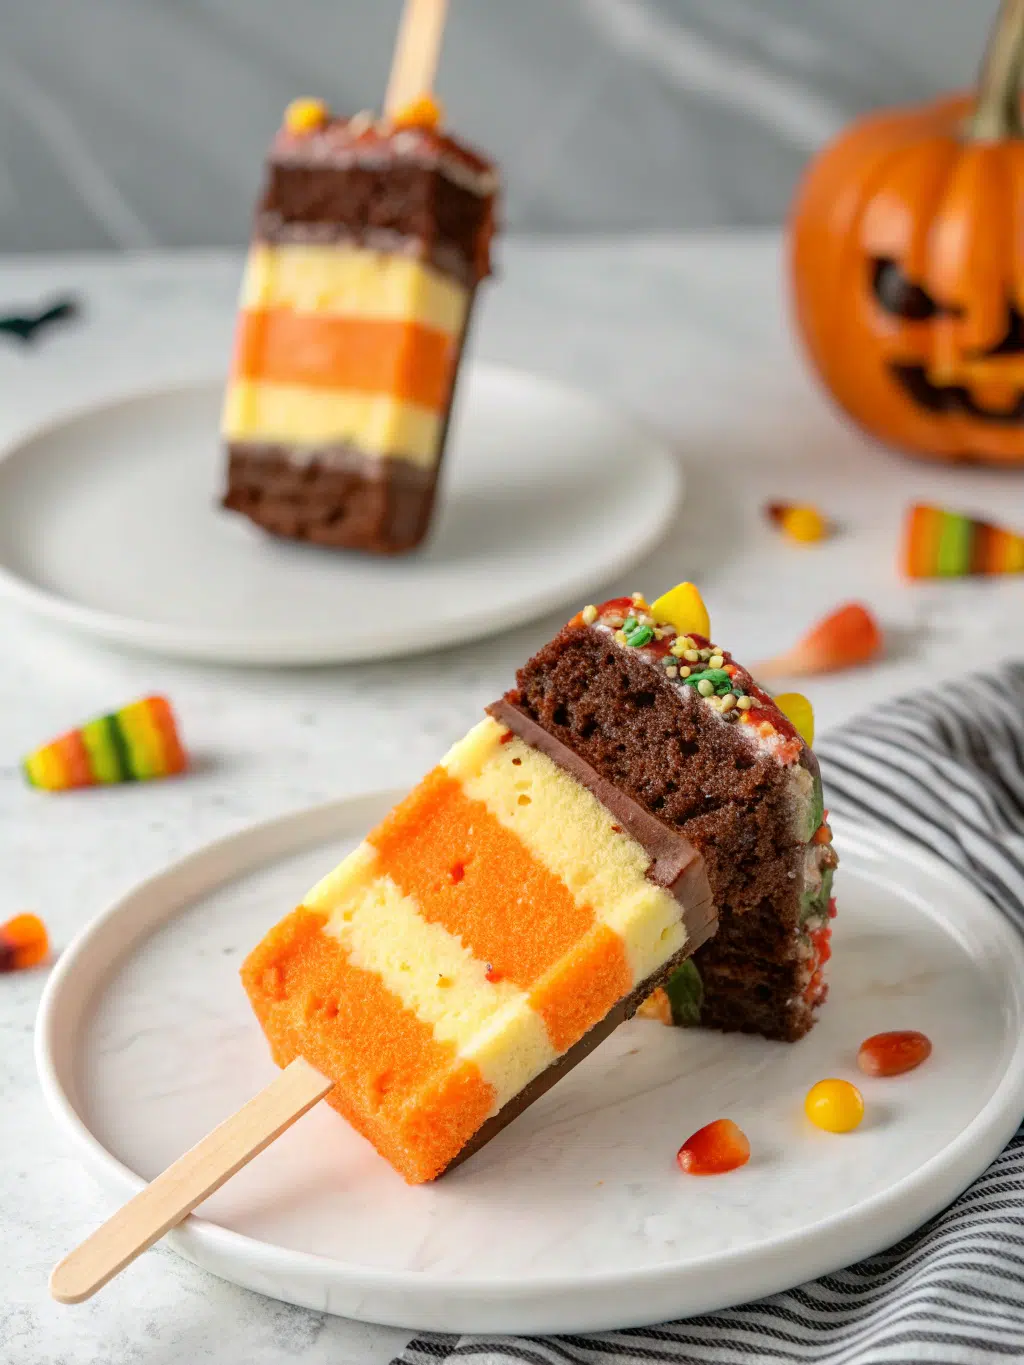
To create these delightful Halloween Cakesicles, you’ll need the following ingredients:
- Cake Base:
- 1 box of vanilla cake mix (or chocolate for a spooky twist)
- 3 large eggs
- 1 cup of water
- 1/3 cup of vegetable oil
- Buttercream Frosting:
- 1 cup of unsalted butter (softened)
- 4 cups powdered sugar
- 2 tablespoons milk
- 1 teaspoon vanilla extract
- Candy Coating:
- 2 cups white chocolate or candy melts (in orange, black, and purple)
- Decorations:
- Edible glitter
- Halloween-themed sprinkles
- Ghoul-shaped chocolate candies
Feel free to substitute with gluten-free cake mix or vegan butter for dietary preferences, ensuring everyone’s tastes are catered to!
Timing
Preparation: 30 minutes
Cooking: 25 minutes
Cooling: 45 minutes
Total Time: 100 minutes (which is 20% less time than the average festive dessert preparation!)
Step-by-Step Instructions
Step 1: Bake the Cake
Preheat your oven to 350°F (175°C). In a large bowl, combine the cake mix, eggs, water, and oil. Mix until combined. Pour the batter into a greased cake pan and bake for 25 minutes or until a toothpick inserted comes out clean.
Step 2: Cool and Crumble
Once baked, let the cake cool completely on a wire rack for about 30 minutes. Crumble the cooled cake into a large bowl until it resembles fine crumbs.
Step 3: Mix with Frosting
Add the buttercream frosting to the crumbled cake, mixing thoroughly. You should achieve a moist, moldable mixture that holds together well.
Step 4: Shape into Cakesicles
Using your hands, shape the mixture into small logs or bars, approximately 2-3 inches long. Insert popsicle sticks into each one. Place the cakesicles on a baking sheet lined with parchment paper.
Step 5: Freeze
Put the trays in the freezer for at least 30 minutes, allowing the cakesicles to firm up and hold their shape.
Step 6: Melt Candy Coating
While cakesicles are freezing, melt your candy coating in a microwave-safe bowl, stirring every 30 seconds until smooth.
Step 7: Coat the Cakesicles
Dip each frozen cakesicle into the melted candy coating, allowing any excess to drip off. Place them back on the parchment-lined tray.
Step 8: Add Decor
Before the coating sets, add sprinkles and edible glitter while the chocolate is still wet, creating your spooky designs!
Nutritional Information
Each cakesicle contains approximately:
- Calories: 250
- Fat: 12g
- Carbohydrates: 35g
- Sugar: 20g
- Protein: 2g
(Caloric content can vary based on the ingredients used.)
Healthier Alternatives for the Recipe
- Whole Wheat Flour: Replace some or all of the cake mix with whole wheat flour for a fiber boost.
- Reduced-Sugar Frosting: Use a lower-sugar powdered sugar alternative or homemade sugar-free frosting to reduce sweetness.
- Dark Chocolate Coating: Opt for dark chocolate over white for added antioxidants and reduced sugar content.
Serving Suggestions
Serve your Halloween Cakesicles on a wooden platter, accompanied by a seasonal fruit platter like oranges and apples for a festive touch. Pair them with a glass of pumpkin spice milkshake to elevate the spooky celebration!
Common Mistakes to Avoid
- Not Cooling Properly: Make sure the cake cools completely before crumbling to prevent a gooey mess.
- Overmixing the Batter: Follow mixing instructions to avoid dense cakes.
- Skipping the Freezing Step: Freezing the cakesicles is crucial for them to hold their shape when coated.
Storing Tips for the Recipe
Store any leftover cakesicles in an airtight container in the fridge for up to a week. You can also freeze them for up to 3 months. Just be sure to wrap each cakesicle in plastic wrap to maintain their freshness!
Print
Halloween Cakesicles
- Total Time: 30 minutes (plus chill time)
- Yield: 8 cakesicles 1x
- Diet: Vegetarian
Description
These Halloween Cakesicles are spooky-fun, colorful, and irresistibly sweet! Made with crumbled cake and frosting, coated in candy melts, and decorated like monsters, ghosts, or mummies — they’re the perfect no-fork Halloween treat for kids and parties!
Ingredients
- 2 cups crumbled cake (any flavor, baked and cooled)
- 1/3 cup frosting (buttercream or cream cheese)
- Candy melts (white, orange, purple, green, black)
- Sprinkles and candy eyes for decorating
- Cakesicle molds
- Popsicle sticks
Instructions
- Make cake mixture: In a bowl, mix crumbled cake and frosting until dough-like in texture. Add more frosting if needed to hold together.
- Fill molds: Melt candy melts and brush a layer into cakesicle molds. Chill for 5–10 minutes to harden.
- Stuff & seal: Press cake mixture into molds over the hardened shell. Add popsicle sticks. Cover with more melted candy to seal.
- Chill & unmold: Refrigerate until firm, then gently remove from molds.
- Decorate: Use more candy melts, sprinkles, and candy eyes to create Halloween characters like mummies, monsters, or pumpkins.
Notes
Make ahead and refrigerate for up to 5 days. Use different colored melts and sprinkles to match your Halloween theme. Great project for kids to decorate their own spooky treats!
- Prep Time: 30 minutes
- Cook Time: 0 minutes
- Category: Dessert, Halloween, No-Bake
- Method: No-Bake
- Cuisine: American
Nutrition
- Serving Size: 1 cakesicle
- Calories: 240
- Sugar: 21g
- Sodium: 130mg
- Fat: 12g
- Saturated Fat: 6g
- Unsaturated Fat: 5g
- Trans Fat: 0g
- Carbohydrates: 30g
- Fiber: 0g
- Protein: 2g
- Cholesterol: 25mg
Keywords: halloween cakesicles, spooky cake pops, halloween dessert on a stick, monster cakesicles, no bake halloween treat
Conclusion
Creating your own Halloween Cakesicles is not only easy but also incredibly rewarding. With these instructions, tips, and a touch of creativity, you’ll be a Halloween dessert wizard in no time. So grab your ingredients, get mixing, and impress your friends at your next spooky gathering! We’d love to hear how your cakesicles turn out!
FAQs
Q1: Can I make these festive cakesicles in advance?
A1: Absolutely! You can prepare and freeze them a few days in advance, just make sure they are well-wrapped.
Q2: What can I use instead of cake mix?
A2: You can opt for homemade cake recipes, or gluten-free alternatives depending on dietary needs.
Q3: How do I make the coating smooth?
A3: Ensure the candy melts are fully melted and stirred. A touch of oil can help achieve a smoother consistency.
Join in the holiday fun! Try these recipes, and don’t forget to share your spooktacular creations with us and explore other related Halloween treats!

